Category : Cloth Diapering

Cloth Diapering How To/Demo Velcro/Aplix Closure Warranties

Replacing Bumgenius 3.0 Aplix or Velcro & Laundry Tabs Without a Sewing Machine (Bumgenius Refresher Tutorial)

bumgenius aplix replacement without a sewing machine

Yes, it can be done; I did it.  I have lots of pictures for you!
 
My cloth diaper stash started with 6 Bumgenius 3.0 pocket diapers.  I bought three in October 2009 to try, followed by 3 more about a week later.  Those 6 got a ton of use as I slowly built up my stash.  As I expected, after nearly constant use, the aplix started to curl, and the laundry tabs started to shrink.  Three of the six were replaced under the Bumgenius warranty, (Cottonbabies’ warranty and customer service are superb by the way) however, the other three really weren’t bad enough to be replaced before the 1-year warranty ended.
 
worn out bumgenius velcroworn out bumgenius aplix
worn out bumgenius laundry tabsshrunken bumgenius laundry tabs

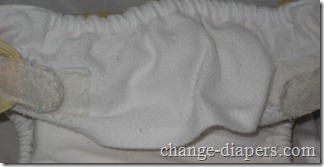
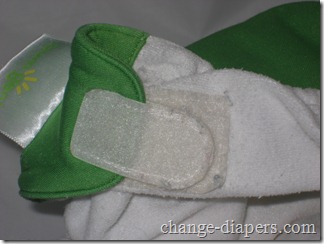
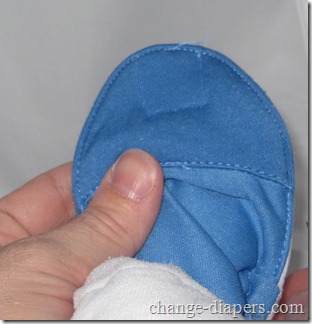
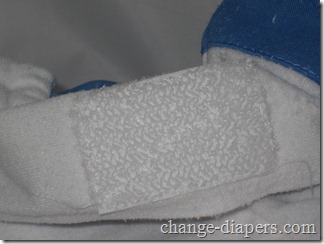
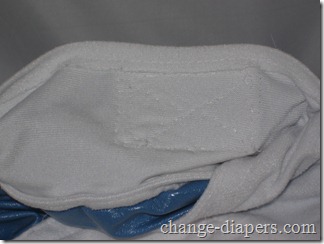
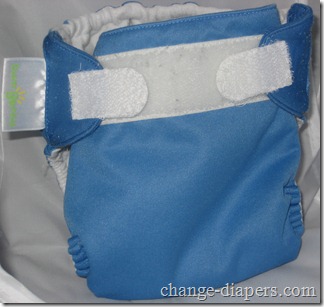
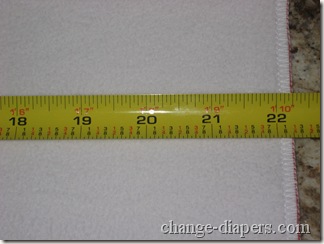
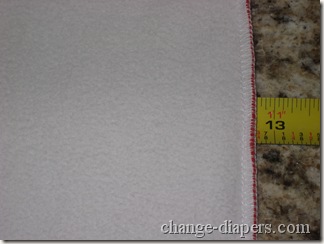
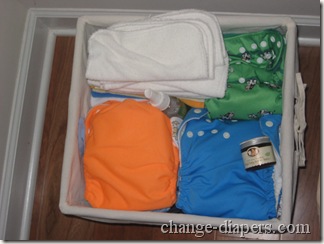
I have quite a stash of diapers in rotation now; I wash every other day, and diapers are used just a few times a week.  However, two of my Bumgenius 3.0s are still my primary night time diapers (I rotate 4, including a fitted/wool, but the BG are my favorites) so they are still used a lot.  You can see above that the laundry tabs are shrunken and the closure tabs are starting to curl.  They still stick fine to the front of the diaper, but they don’t stick to the laundry tabs anymore.
 
16 month old bumgenius 3.016 month old bumgenius laundry tabs

laundry tabback of laundry tab

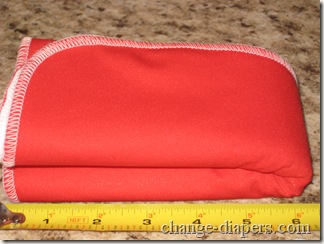
On the other hand, one 3.0 that has been in my regular rotation still looks fine after 16 months.

bumgenius refresher kit

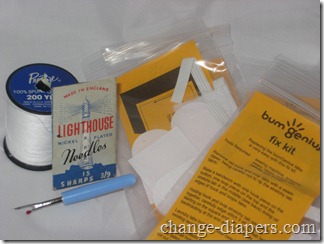
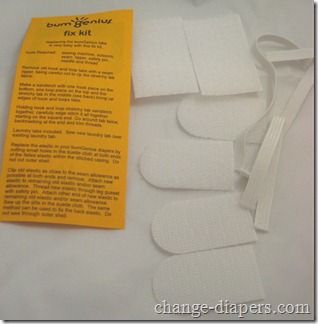
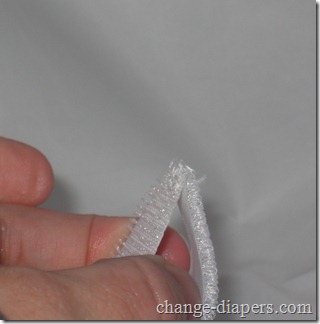
Cottonbabies sells Bumgenius refresher kits for $1.00 each.  They include 3 pieces of elastic, two closure tabs, two laundry tabs, and ship for free.

The kits also include instructions for doing the repairs with a sewing machine.  I’ve adapted them to do it by hand!  Luckily, I didn’t need to replace any elastic, so I’ve just done the closure and laundry tabs.  I decided to try this on a Bumgenius 3.0 AIO I got for free with a coupon code.  That way if I really screwed it up, I wouldn’t be heartbroken!

removing tabscutting tabs

cut tab

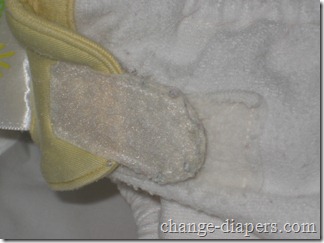
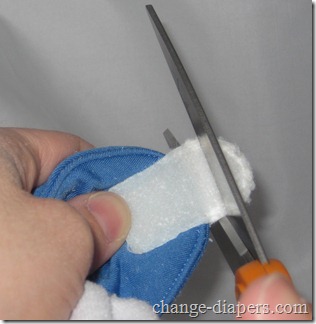
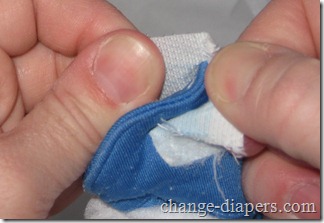
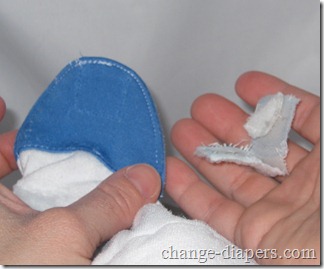
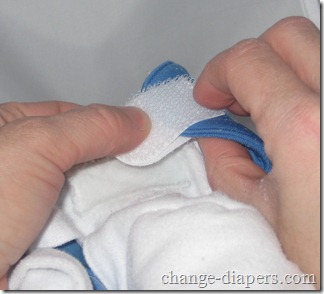
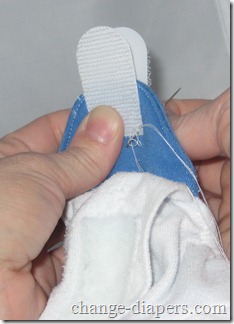
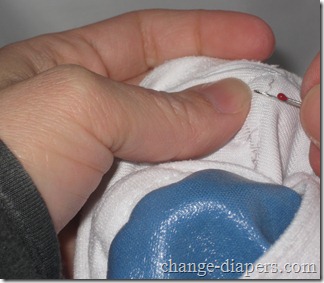
First, I very carefully cut the ends of the closure tabs.  The instructions say to remove them with a seam ripper, but I found it much easier to cut the tabs first.  Of course, you want to be very careful not to cut the diaper!

opening tabremoving old tab

seam ripping tabremoving tab

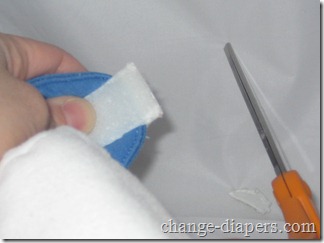
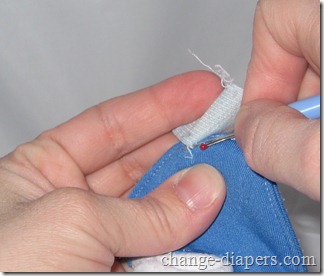
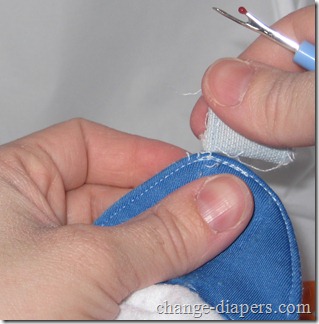
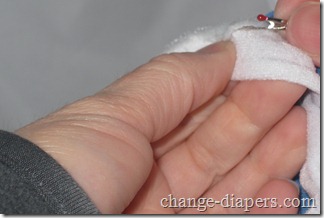
After cutting the ends of the tabs off, it was easy to use a seam ripper to loosen the tabs and remove them.

tab almost offtabs off
tabs offtabs off

bumgenius refresher instructions

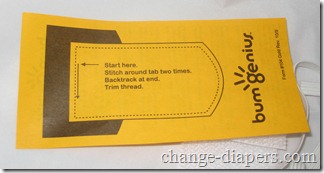
The refresher kit included instructions on how to attach the new tabs of course.

new tabssecuring new tabs

new closure tabs

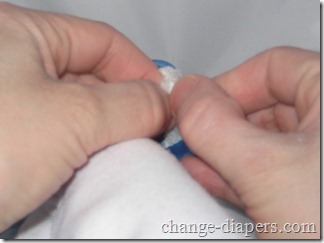
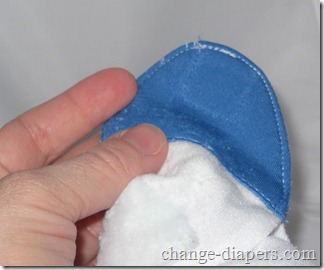
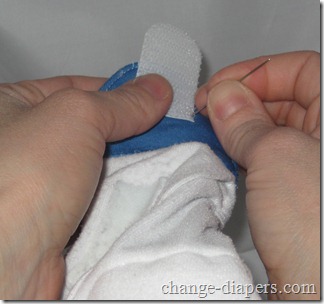
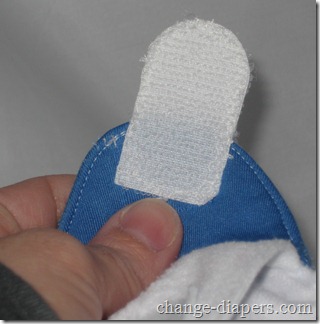
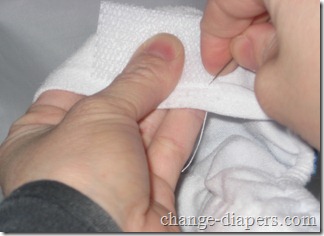
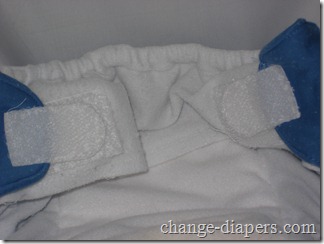
Once I had placed the new tabs, I decided to put a couple stitches to hold the tabs together.  This way it was a little bit easier to keep the tabs in the right place against the diaper, and against each other.

stitches to hold together

As instructed, I started on the flat side and went around the tab twice.

sewing new bumgenius tabsbumgenius velcro replacement by hand

bumgenius aplix replacement

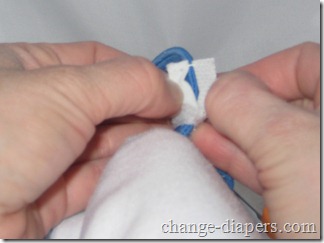
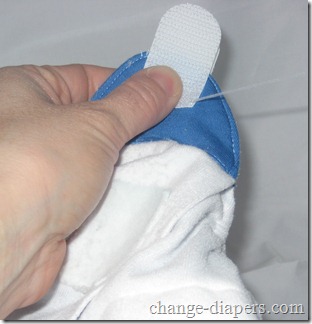
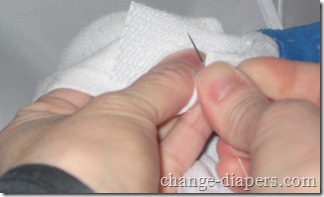
When I finished, I realized the tab had slipped a bit as I was sewing, and ended up a little crooked.  It really doesn’t matter, since the laundry tabs and front strip are quite large and forgiving!

finished tabgrippy side

fuzzy side

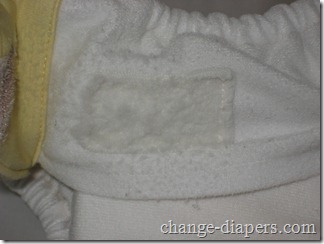
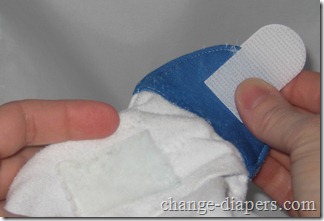
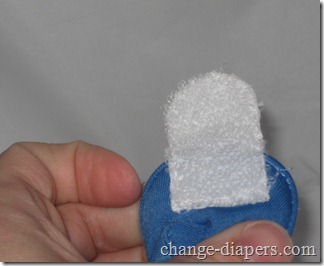
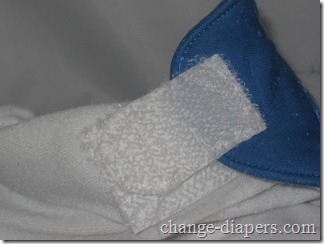
The awesome thing about these refresher kits, is that they include the new, “4.0 style” laundry tabs, which (so far) seem to function and hold up far better than the 3.0 style.  Of course, if you are buying these kits from your favorite retailer, check with them first to see which style kit they have.

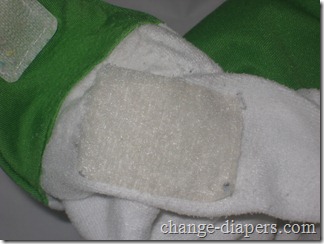
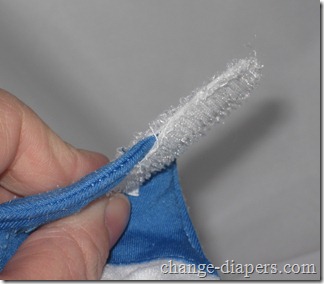
The instructions say to sew right over the old laundry tabs, but I decided to remove them.

removing old laundry tabsseam ripping old laundry tabs

It took a little longer to remove these than the closure tabs, but it was still pretty quick work.

removed laundry tab

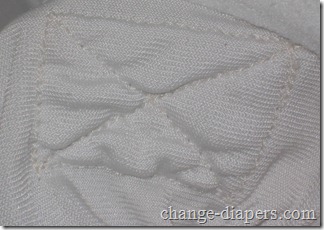
I sewed around the edge of each laundry tab, then in an x through the middle, like the original tabs.

sewing new bumgenius laundry tabreplacing bumgenius laundry tabs by hand

I didn’t really worry too much about making my stitching perfectly even and straight, and I don’t think it was noticeable on the finished tabs.

new bumgenius laundry tabsback

I am pretty happy that $1.00 and some time gave my diapers new life!

bumgenius refresher

I’m not going to lie, this was definitely a little time consuming and tedious to do by hand!

new laundry and closure tabsbumgenius refresher without a sewing machine

The hardest part was going through the thickest portion of the tab where the diaper’s stretchy tab was seamed.  I probably wouldn’t sit down and try to refresh a whole stack of diapers by hand in one sitting, but I will do the others one at a time eventually!

I’m not sure exactly how long it took me; it definitely took me a bit longer since I was taking pictures as I went.  I’m sure the next diapers will go more quickly since I know what I’m doing now!  I want to order an extra kit to replace the horrid laundry tabs on my Blueberry diaper too!

Share on Pinterest
Read More
 
Cloth Diapering Diaper Sprayers How To/Demo

Video Demo of the Dunk & Swish (& Flush) Method

A few readers had asked for a video of my dunk and swish method.  Since I love you guys, I obliged.  I don’t like the sound of my voice, and I did my fair share of stammering since I was nervous!  My New York friend says I have an accent, but I think she’s the one with the accent, hee hee!

If your baby is breastfed (or on very few solids) there is no need to rinse the diapers first, just throw them in the wash.  I’ve heard that formula fed baby poop is the same, but I don’t have first hand experience with that.

When your baby is older, you can flip the solids into the toilet and flush; anything remaining is usually fine to go in the wash.  However, in that in-between stage (or in my case, when baby has had a lot of fruit or juice!) diapers need a little extra help.  If you don’t have a diaper sprayer, you can still dunk and swish without sticking your hands in gross water!

I almost forgot: I can’t take credit for this method, I am pretty sure it was one of my readers who suggested I try it, but I can’t for the life of me remember who!

Share on Pinterest
There are no images.
Read More
 
Cloth Diapering Mailbox Mondays

Mailbox Mondays 1/10/11 – I’m asking you some questions!

>

 email me

Another week with no Mailbox Mondays submissions!  Remember that submitted questions don’t have to be cloth diaper related.  Email maria at change-diapers.com with “Mailbox Mondays” in the subject.

Since this makes two weeks with no submissions, I’ll put the MM posts on hold.  If I get a submission, I will publish it, otherwise I will post something else/skip etc.

Today I think I’ll ask you some questions instead.

1. People choose to cloth diaper for many reasons.  Financial, environmental or health concerns, or even because they are just so gosh darn cute!  What was your main motivator for using cloth?

2. What was your very first cloth diaper?  Do you still have it? 

3. What is your favorite brand/type of diaper?  Has your favorite changed over time?

4. Have you overcome any obstacles with cloth (eg. detergent/stink issues, yest, rash, leaks, night time solutions etc.)

5. Is there a brand of diaper you’re interested in, that you’d like to see me review?  Is there a diaper you’re just dying to win?  One you don’t see given away much, or just one you keep entering to win but don’t win?

Anything else you have to say for yourself?  🙂

Share on Pinterest
Read More
 
Cloth Diapering

The future of Cloth, Part IV of ? Ease of Care and use

>This is part 4 of my ramblings on the future of cloth diapering!  See Part 1, Part 2 and Part 3 if you missed them!

I want cloth to be easier.  I know that if I just gave away all of my cloth diapers when I was finished with them, I’d still be ahead financially.  However, I’d like for minor repairs on diapers to be easier for people like me.  I can sew a button and so forth, but I don’t have a sewing machine, and I’m really rather intimidated by the idea of diaper repair.

I have a post in the works to do a step by step Bumgenius refresher using just a needle, thread and scissors.  I am OK with the Velcro replacement, but I’m thanking my lucky stars that my elastic doesn’t need to be replaced!!  With the Bumgenius 4.0, Cottonbabies somewhat acknowledged this by making the elastic slightly more easy to replace.  It still scares me.  My Fuzzibunz “one size” diaper actually came with spare elastic and you can replace it with no sewing and no seam ripping!  I would love to see more diapers like that!!

When thinking about closure tab replacement, I’d love to see the tabs and Velcro strips of diapers (securely) snap or hook on and off.  This way you could swap them out for new as they became worn and swap Velcro for aplix as it suits you and your baby.  I wish I were skilled at photoshop so I could demonstrate exactly what I mean.  I’ve seen a WAHM diaper who had snaps applied through the Velcro strip on the front of the diaper, so you could secure the snaps or secure the Velcro, but that’s not quite what I mean.  I imagine the front of the diaper having say, male snaps.  The Velcro strip would have female snaps on the back, so you could snap it in place.  The snap closure tabs could be removed and replaced with Velcro tabs as you wished.  Then the Velcro could be removed and go back to snaps.

Lastly (I think) I want more diaper companies to recognize that washing needs to be easy.  The only reason I didn’t cloth diaper my son from birth was the detergent issue.  Not everyone has “safe” detergents readily available to them.  Shipping them becomes quite costly, and even if they were available locally, the first detergent you buy won’t necessarily work for you.  My max price for detergent stockpiling pre-cloth diapers was about $2.99 at most.  So going to $10-$15/bottle was a huge leap.  Not to mention then having $100 worth of detergent that didn’t work sitting in my cabinet, or having to “waste” it on regular clothes!

I would love for companies (or someone with lots of time and money) to put diapers to the test in many mainstream detergents.  Truly put them to the test, not just say they are a “no-no” because of some chart made based on ingredients. There are a few companies out there that specifically recommend “regular” detergents, but most say it will damage your diapers and/or void your warranty.  Who wants that?

I have spent a lot of time and money on detergents, followed by battling the stink that ensues.  I firmly believe that the right detergent is one that gets your diapers clean and stink free, doesn’t cause them to repel, and doesn’t give your baby a rash.  Obvious ingredients to stay away from are bleach, fabric softeners or anything that may eat away at the PUL or Elastic.

My other thought was that diaper manufacturers should offer a low cost “sampler” of detergents that they recommend, so you can try them before you purchase.  The problem is that it has taken me several weeks (sometimes months) of using a detergent before it became clear that it wasn’t the one for me.

If you didn’t cloth diaper all of your children, or didn’t start right away, what stopped you?

Share on Pinterest
There are no images.
Read More
 
Cloth Diapering Cloth Diapers Diaper Accessories Made in the USA Review Storage

Planet Wise Changing Pad Review and My New Diaper Storage

>

planet wise changing pad

Until now, I had just been changing my son’s diapers directly on the leather couch.  It’s easy to just wipe it off, but it occurred to me that this might be a little gross (ha ha.)  The Planet Wise Changing Pad retails for $11.99 and I snagged one for even less with a Black Friday sale/coupon/free shipping.

cloth diaper changing pad

The changing pad comes in several colors, but I wish they had some of the cute prints the wet bags come in! They do have them in the prints for $16.50, they just don’t have them listed on their site, and of course not everyone who sells the changing pads has the prints.  Thanks Samuel’s Momma!
 

care instructions

The white side is super soft (I mean soft!) fleece, and the colored side is PUL, so it’s waterproof.  Of course, since it’s fleece, it’s not wipe-able like the plastic ones that come with some diaper bags.  So, you’ll probably want to have at least two on hand.  It is simple to wash with diapers and dries quickly.
 
length of planet wise changing padwidth of planet wise changing pad

The specs say it is 13×21, and that’s pretty close.


size of changing pad folded

 
Even though it’s not wipe-able, it has a leg up on the old plastic changing pads because you can fold it up really tiny and stuff it in a bag!
 
This revelation about the possible grossness of couch diaper changing came along with a furniture rearrange in our family room.  I used to have my diapers stacked on a ledge by the couch, but we shifted things so that we have a “family room” on one side of the room and a “play room” on the other side.  This means my diaper ledge was no longer handy, and I really didn’t love how they looked out in the open anyway.
 

cloth diaper storage

 
I ended up at Target on Black Friday (OMG I know, horrors!) because my 11-year old hair dryer decided to die on me while I was trying to get ready for a baby shower that morning.  Incidentally, boiling your hair dry with a straightening iron isn’t really all that effective, and leaves you smelling like burned hair.
 

cloth diaper organization

 
In any case, I found this “milk crate” size basket for about $17, and it’s the perfect size to hold all my stuff.  I’m also able to tuck it back behind the end table, so I can reach it, but sticky-fingers McStinkypants can’t.
 

Baskets make me happy.  Oh who am I kidding?  Any organization makes me happy!
How about you all?  Did you get anything fluff related with all the great Black Friday sales?
Share on Pinterest
Read More
 
1 26 27 28 29 30 31